LumiNAMA 2023
christmas luminama arduino
LumiNAMA is a community driven initiative that aims to light up the downtown of North Adams, MA each holiday season. Last year, in 2022, I worked alongside Julie Blake to create a window display of North Adams set in miniature that included a colorful light show representing all the holidays of the season. I built and controlled the custom light show with an Arduino and wrote all the code to control the project. You can see the display and how it came to life here.
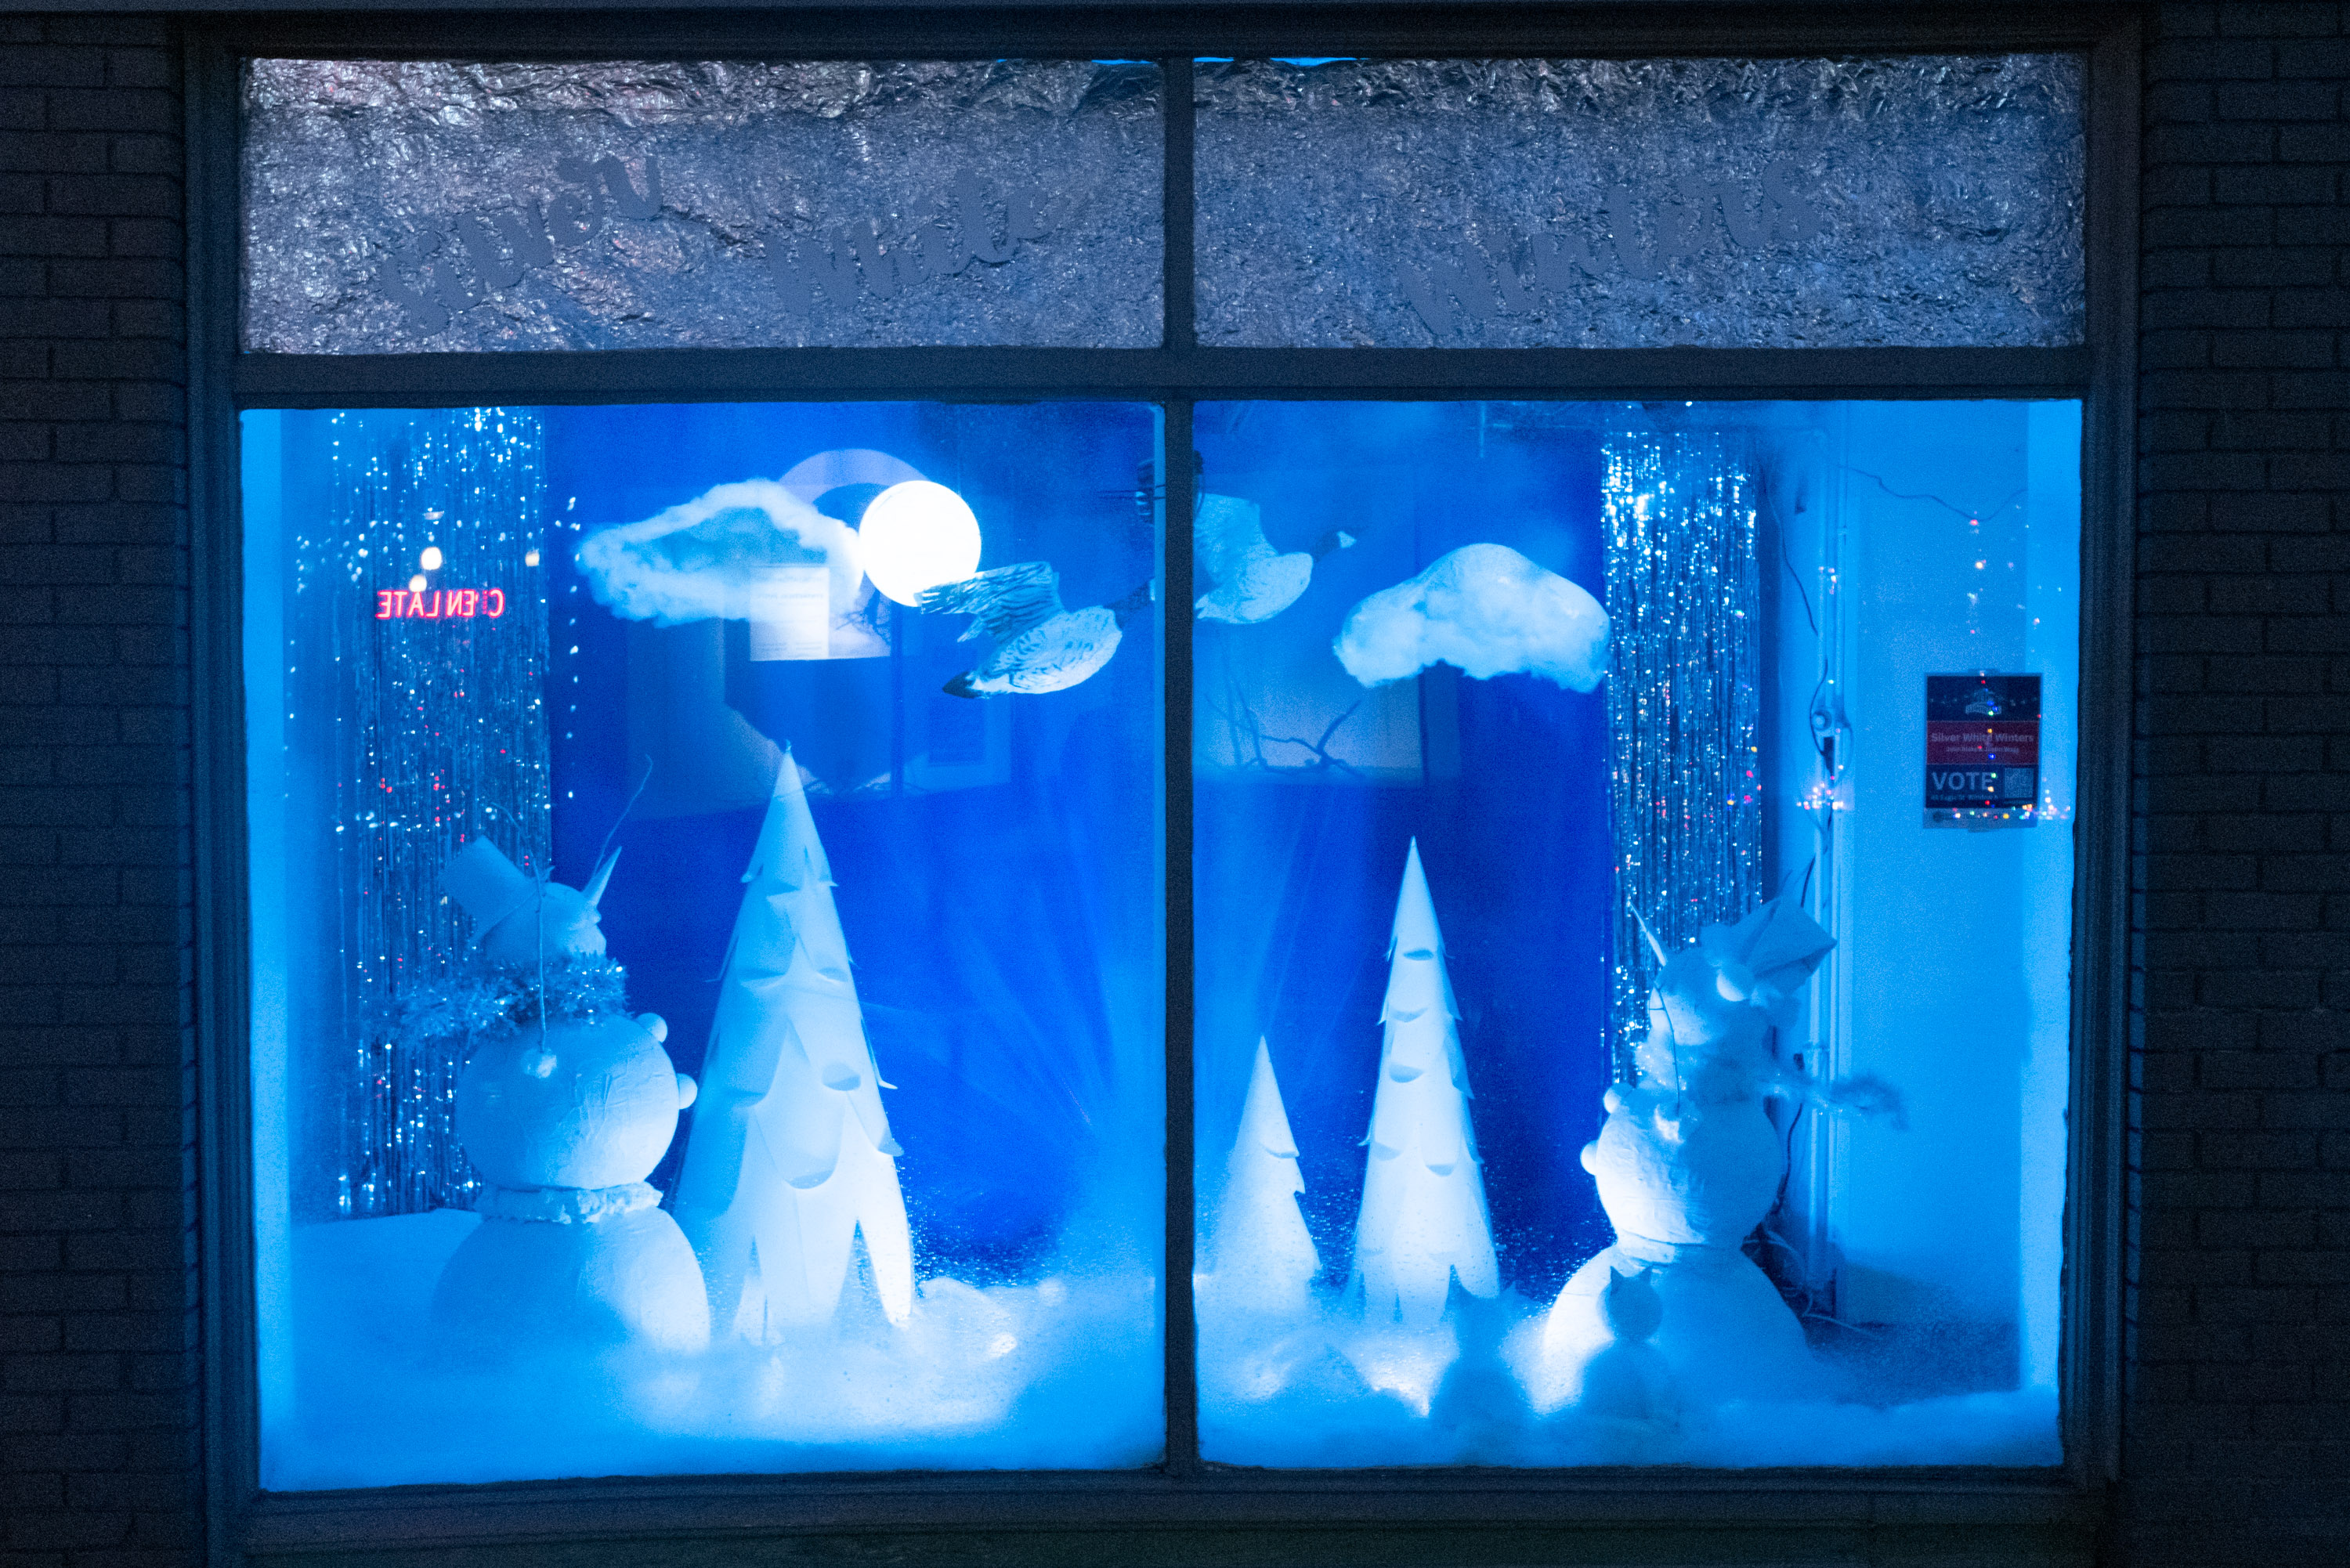
This year our sights were set on a bigger and more ambitious display - filling an entire storefront with a scene inspired by the song “My Favorite Things” (this year’s LumiNAMA theme). Ideas for 2023 had been brewing in our heads since taking down our last display, but with a theme in hand, we set out to create something magical for the season.

This post focuses on the lighting of our display and how it came to be, yet so much work went into the concept, design, and execution of the window as a whole. We worked (almost) around the clock; building, painting, gluing, re-doing and regluing. We’re so pleased with the outcome and hope you get a chance to see it and the other displays downtown this year. Check out LumiNAMA’s website for more details.
Julie’s sketches served as an amazing guide for us and helped to hone our vast array of ideas. We landed on a few lines from the song to feature prominently: “whiskers on kittens”, “wild geese that fly with the moon on their wings”, and “silver-white winters that melt into springs”.
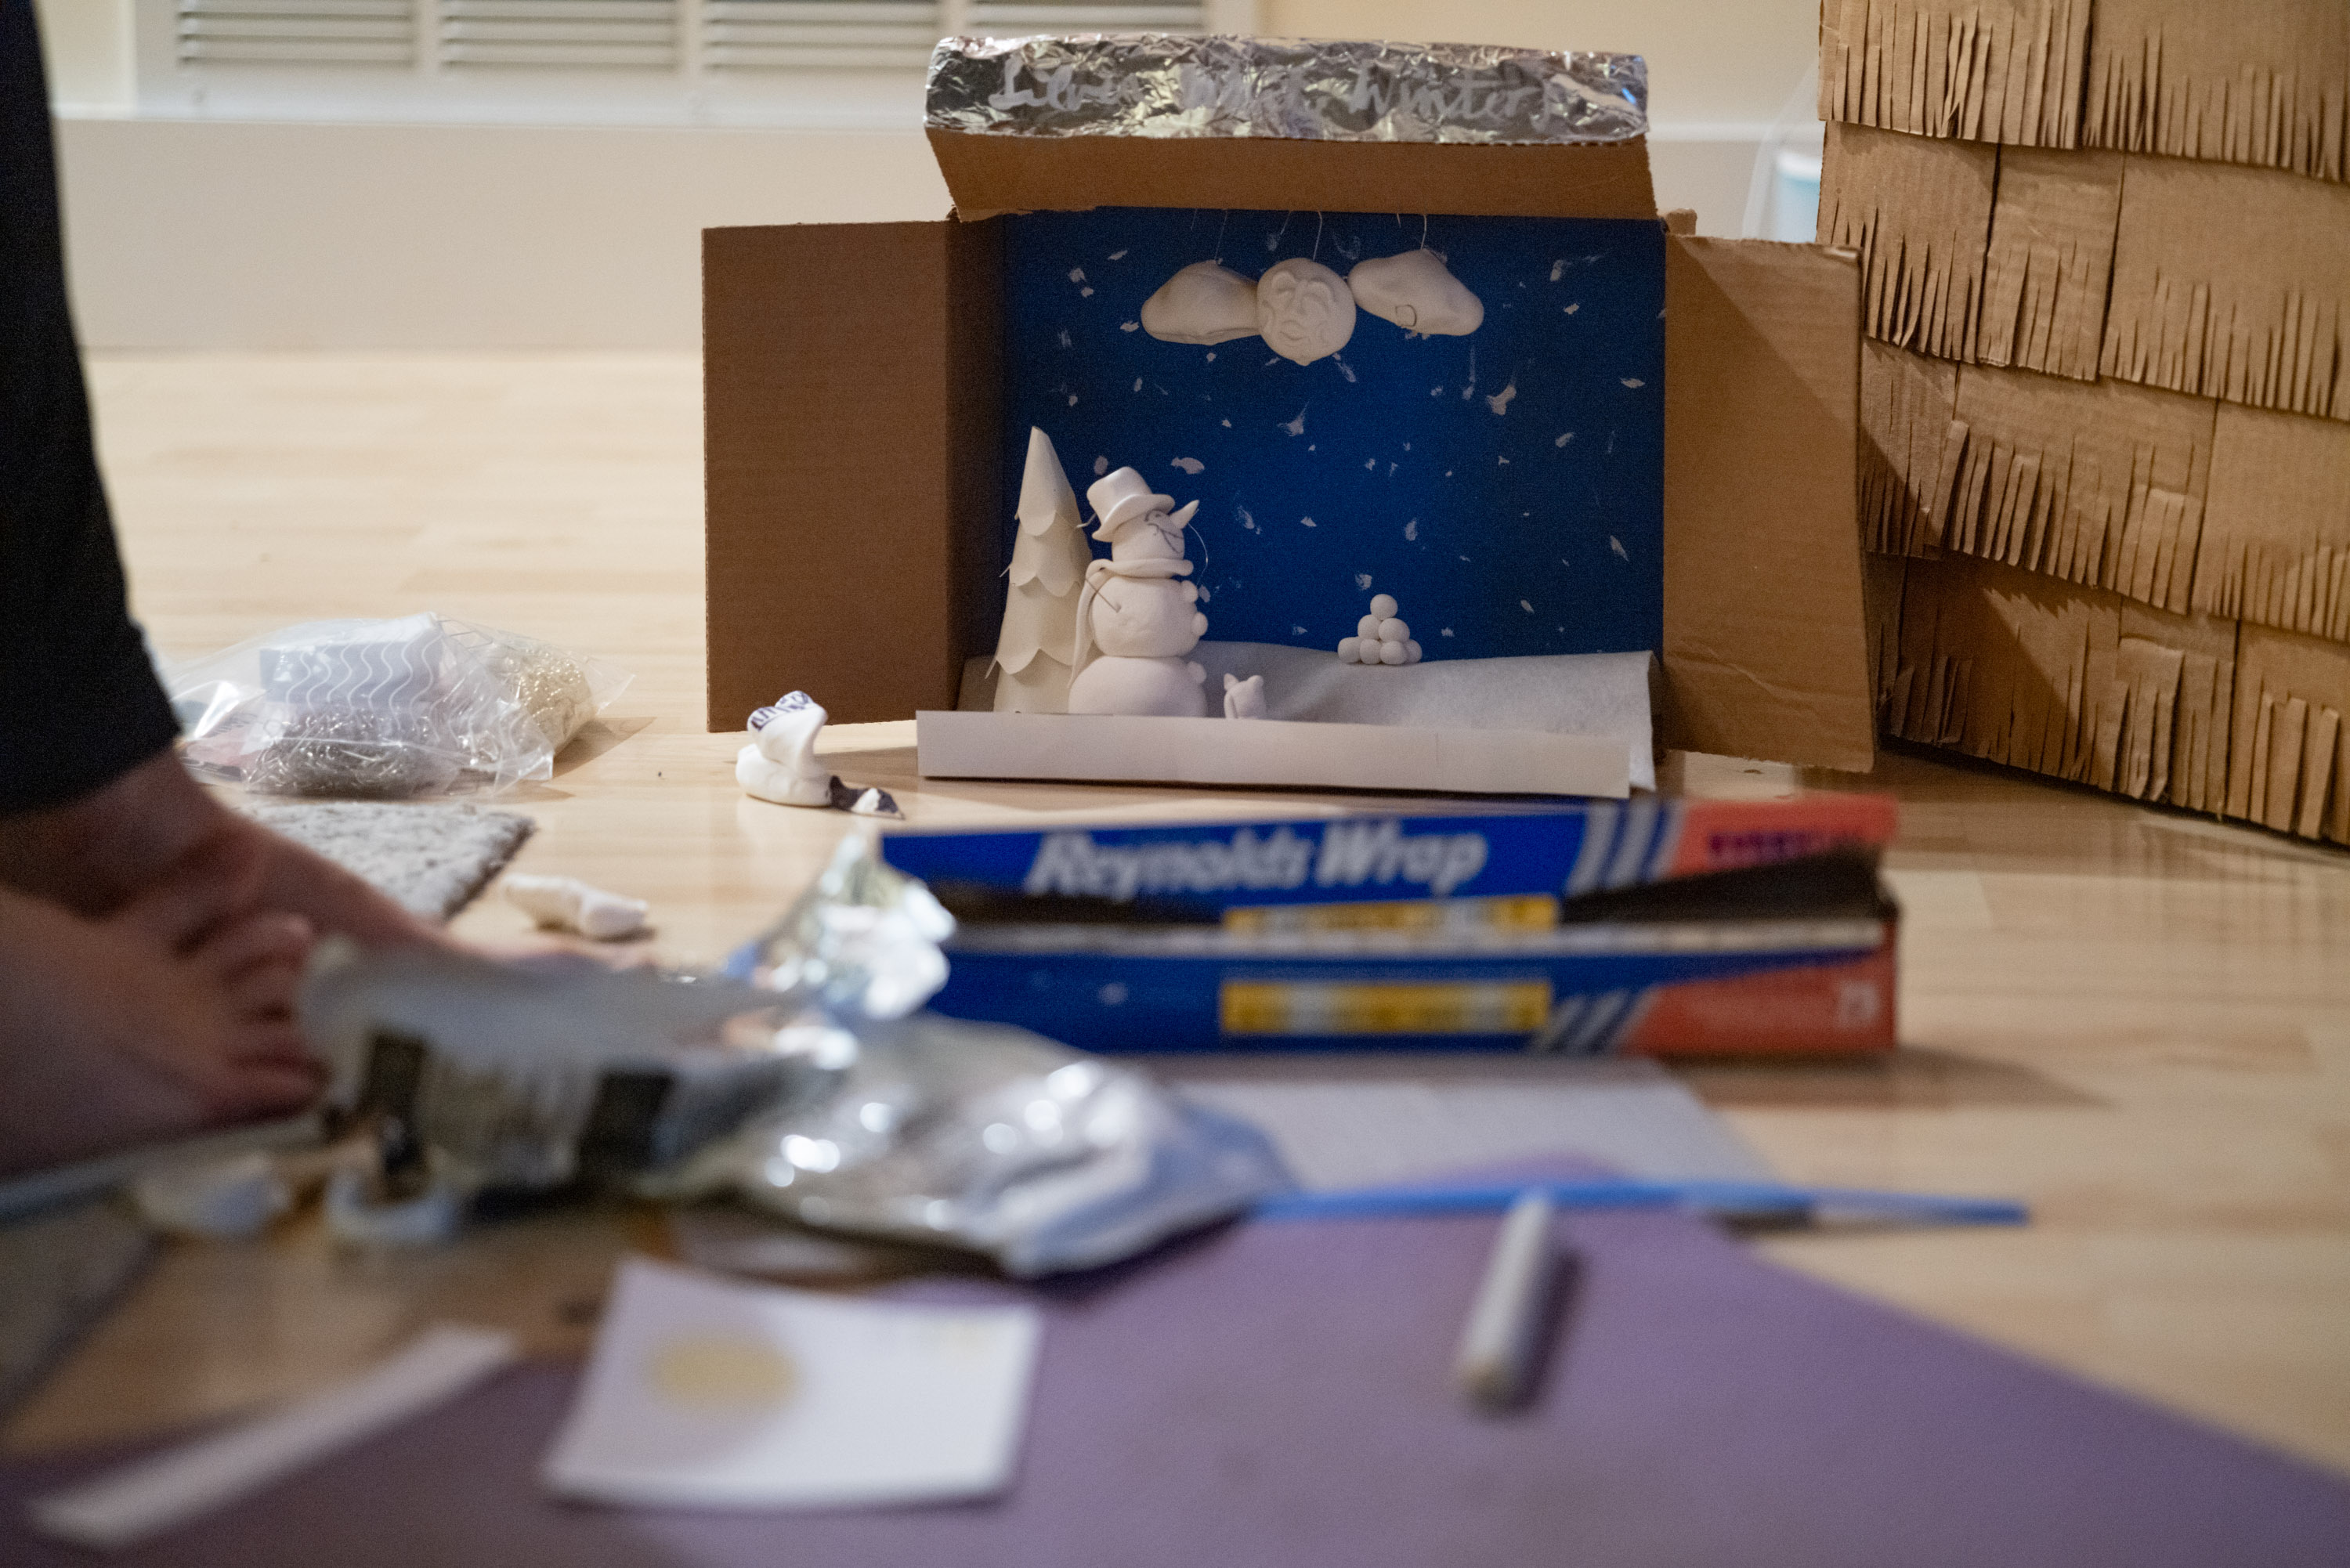
Julie created an impressive, and useful, diorama to help us visualize the window at scale. We were building everything offsite after taking initial measurements and would install during a window of time prior to Light Up Night.
We decided to construct the display mostly from papier-mâché and recycled cardboard. Where possible, we sought to use nothing but raw materials in the building of the display. We thought the reliance on simple materials and “doing it ourselves” would put us to the test and bring the most character out of our display.
To evoke the coldness of a silver-white winter night we wanted to light our display with a northern lights-esque backdrop. We found lights like this that seemed to fit the bill on Amazon and ordered one.
When we ordered the light I knew it would present a challenge because it would likely be remote controlled, and not play well with a timer or a power source that cycled daily. This was confirmed after receiving the light and testing it: the light had many settings (color combos, speeds, effects) and if removed from power would forget the previously selected scene. Once plugged back in it would display a default scene that cycled through all the features, which we did not want. Despite that, the light was capable of exactly what we wanted!
To conform to our needs, the light needed to:
- Turn on via a wall timer,
- Upon turning on display the desired color sequence and
- Run for a month or more with little to no intervention.
With that in mind, I started by disassembling the light to understand how it worked in hopes that we could rework it to our needs.
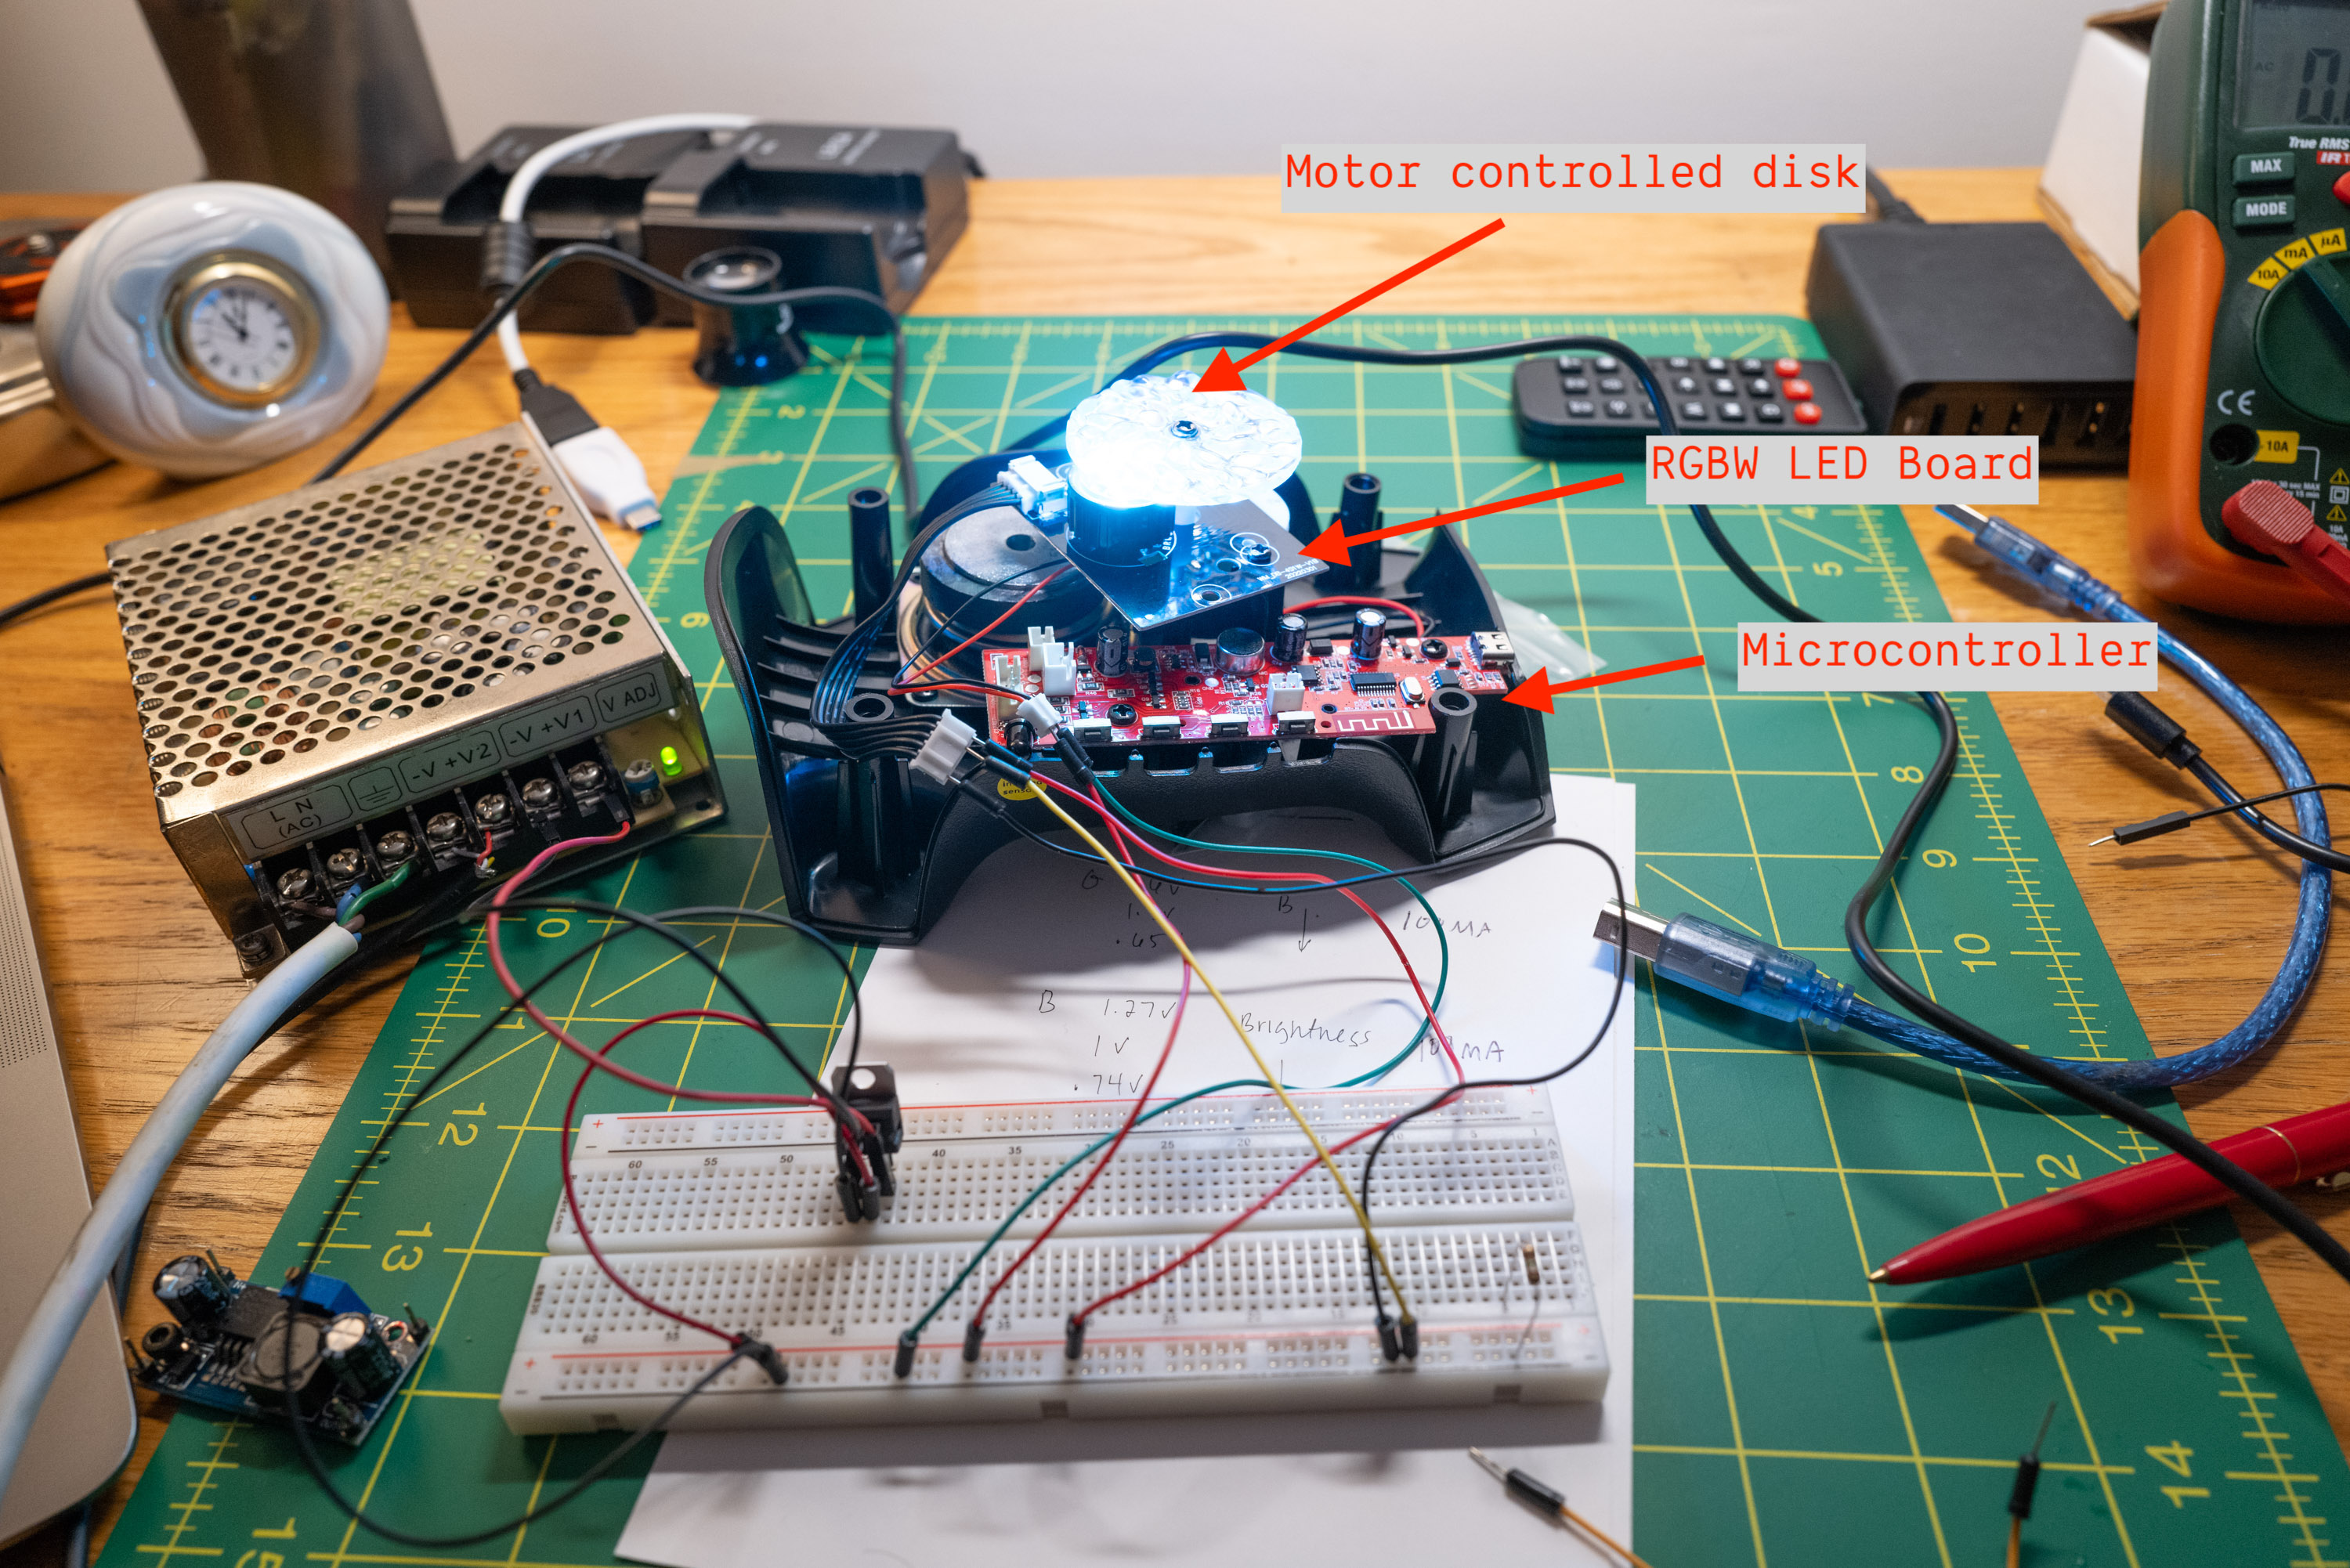
Once apart, I found the source of light was a RGBW LED on a breakout board. I tested the wires leading to the breakout and found that when powered at 3.3V, the LEDs were full bright. The movement effect came from the LEDs shining through a textured plexiglass disk which rotated just above the LED. The rotation of the disk came from a small 5v motor whose speed could be controlled by modifying the voltage to the motor. The onboard microcontroller handled control of the LED, motor, and interfaced with the remote control.
After looking it over, I felt confident that we could use the light by simply “hard-wiring” the LED and motor and removing the microcontroller. Bypassing the microcontroller meant that our hard-wired light would turn on to the exact setting we wanted every time, wouldn’t require any other customization, and would be simple!
My test breadboard looked something like this, with switches to control each of the LED’s and a potentiometer to control the rotation speed.
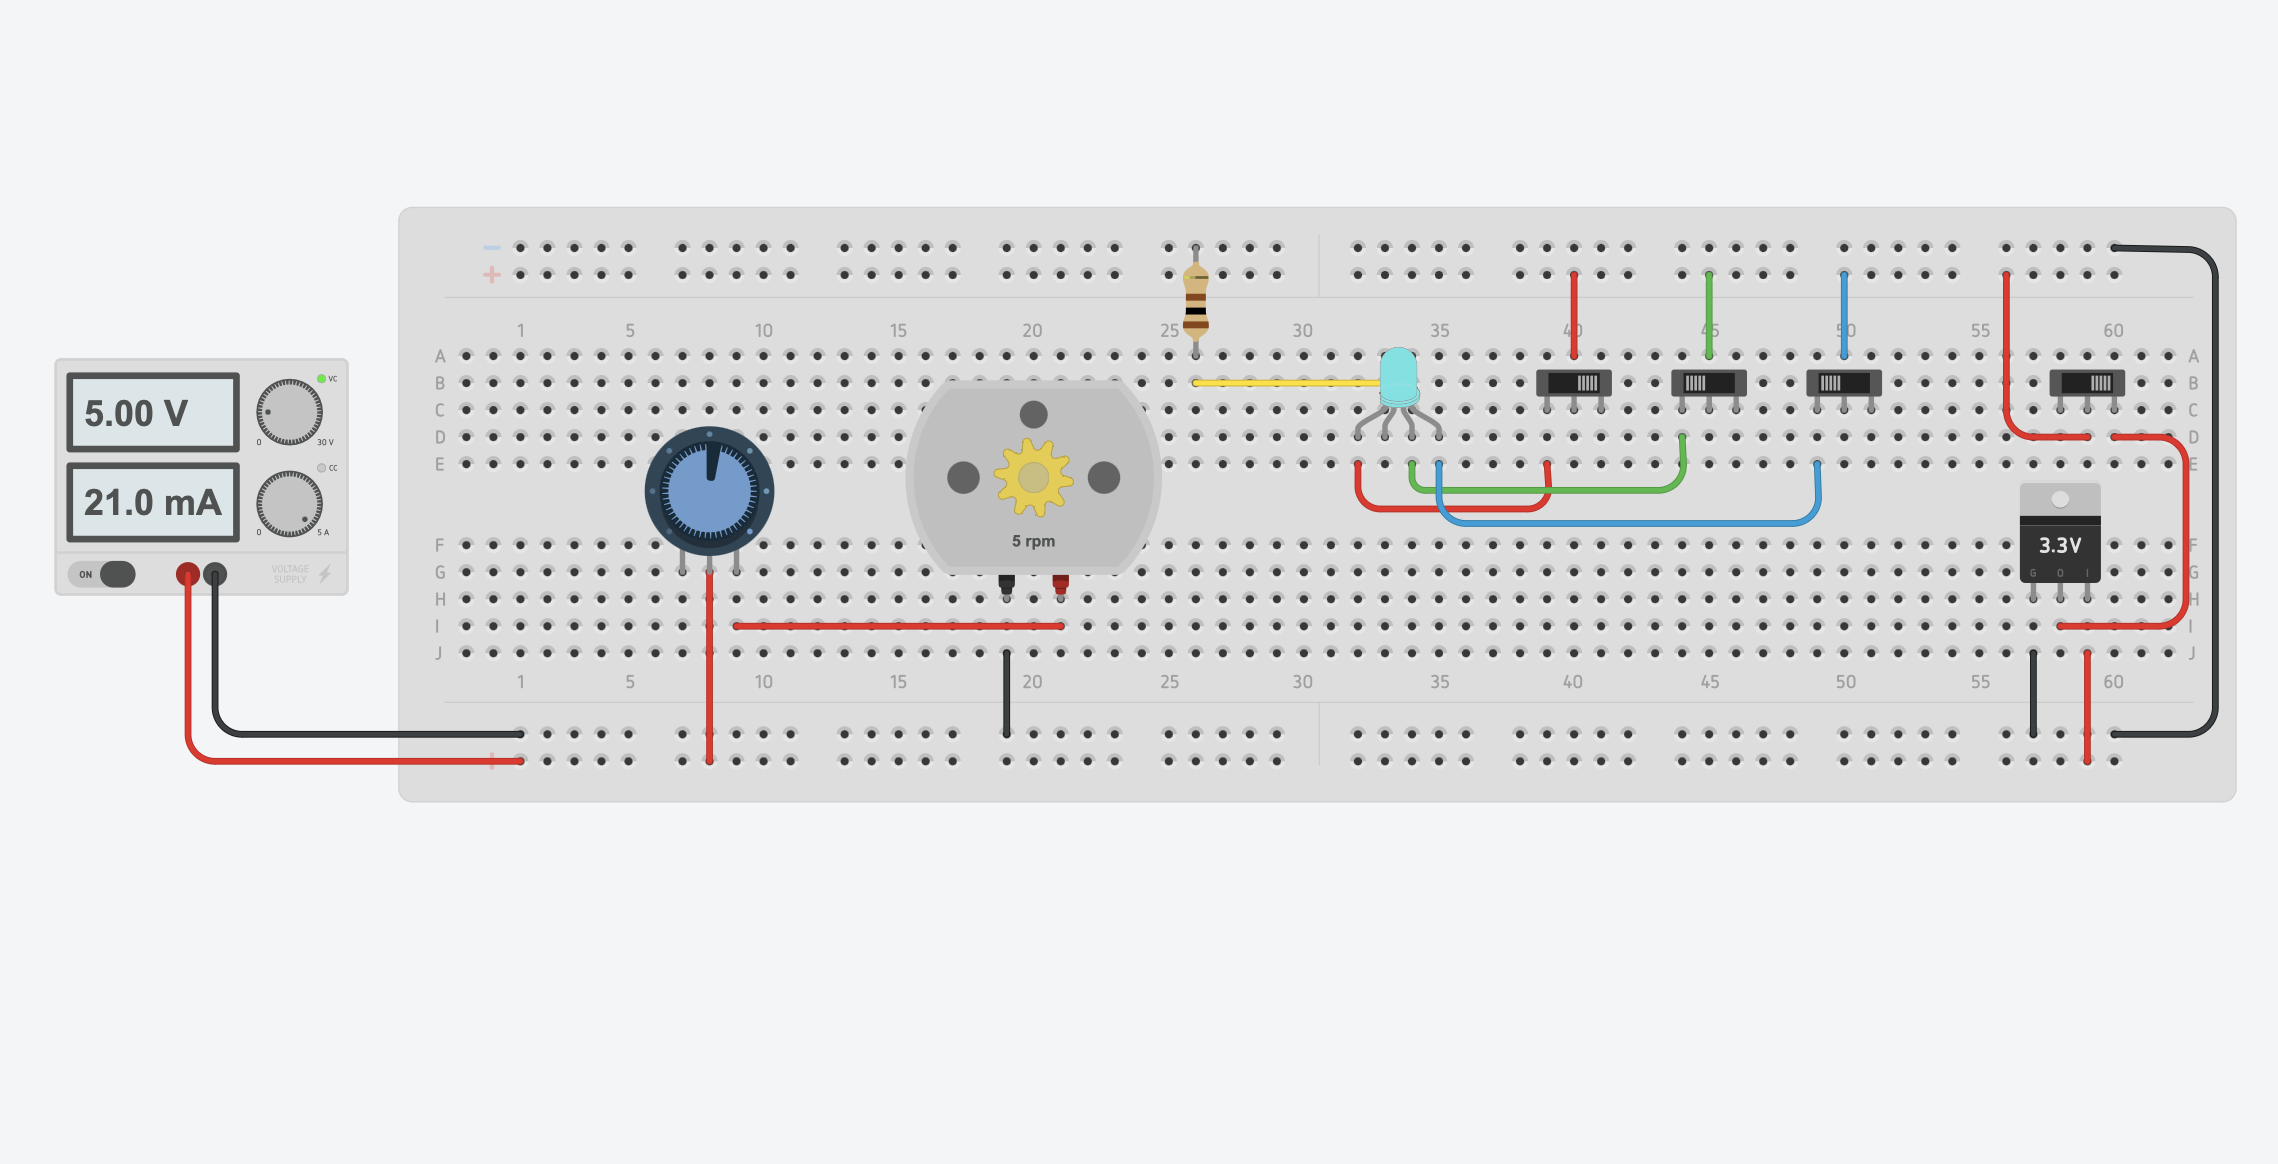 Breadboard created with Tinkercad
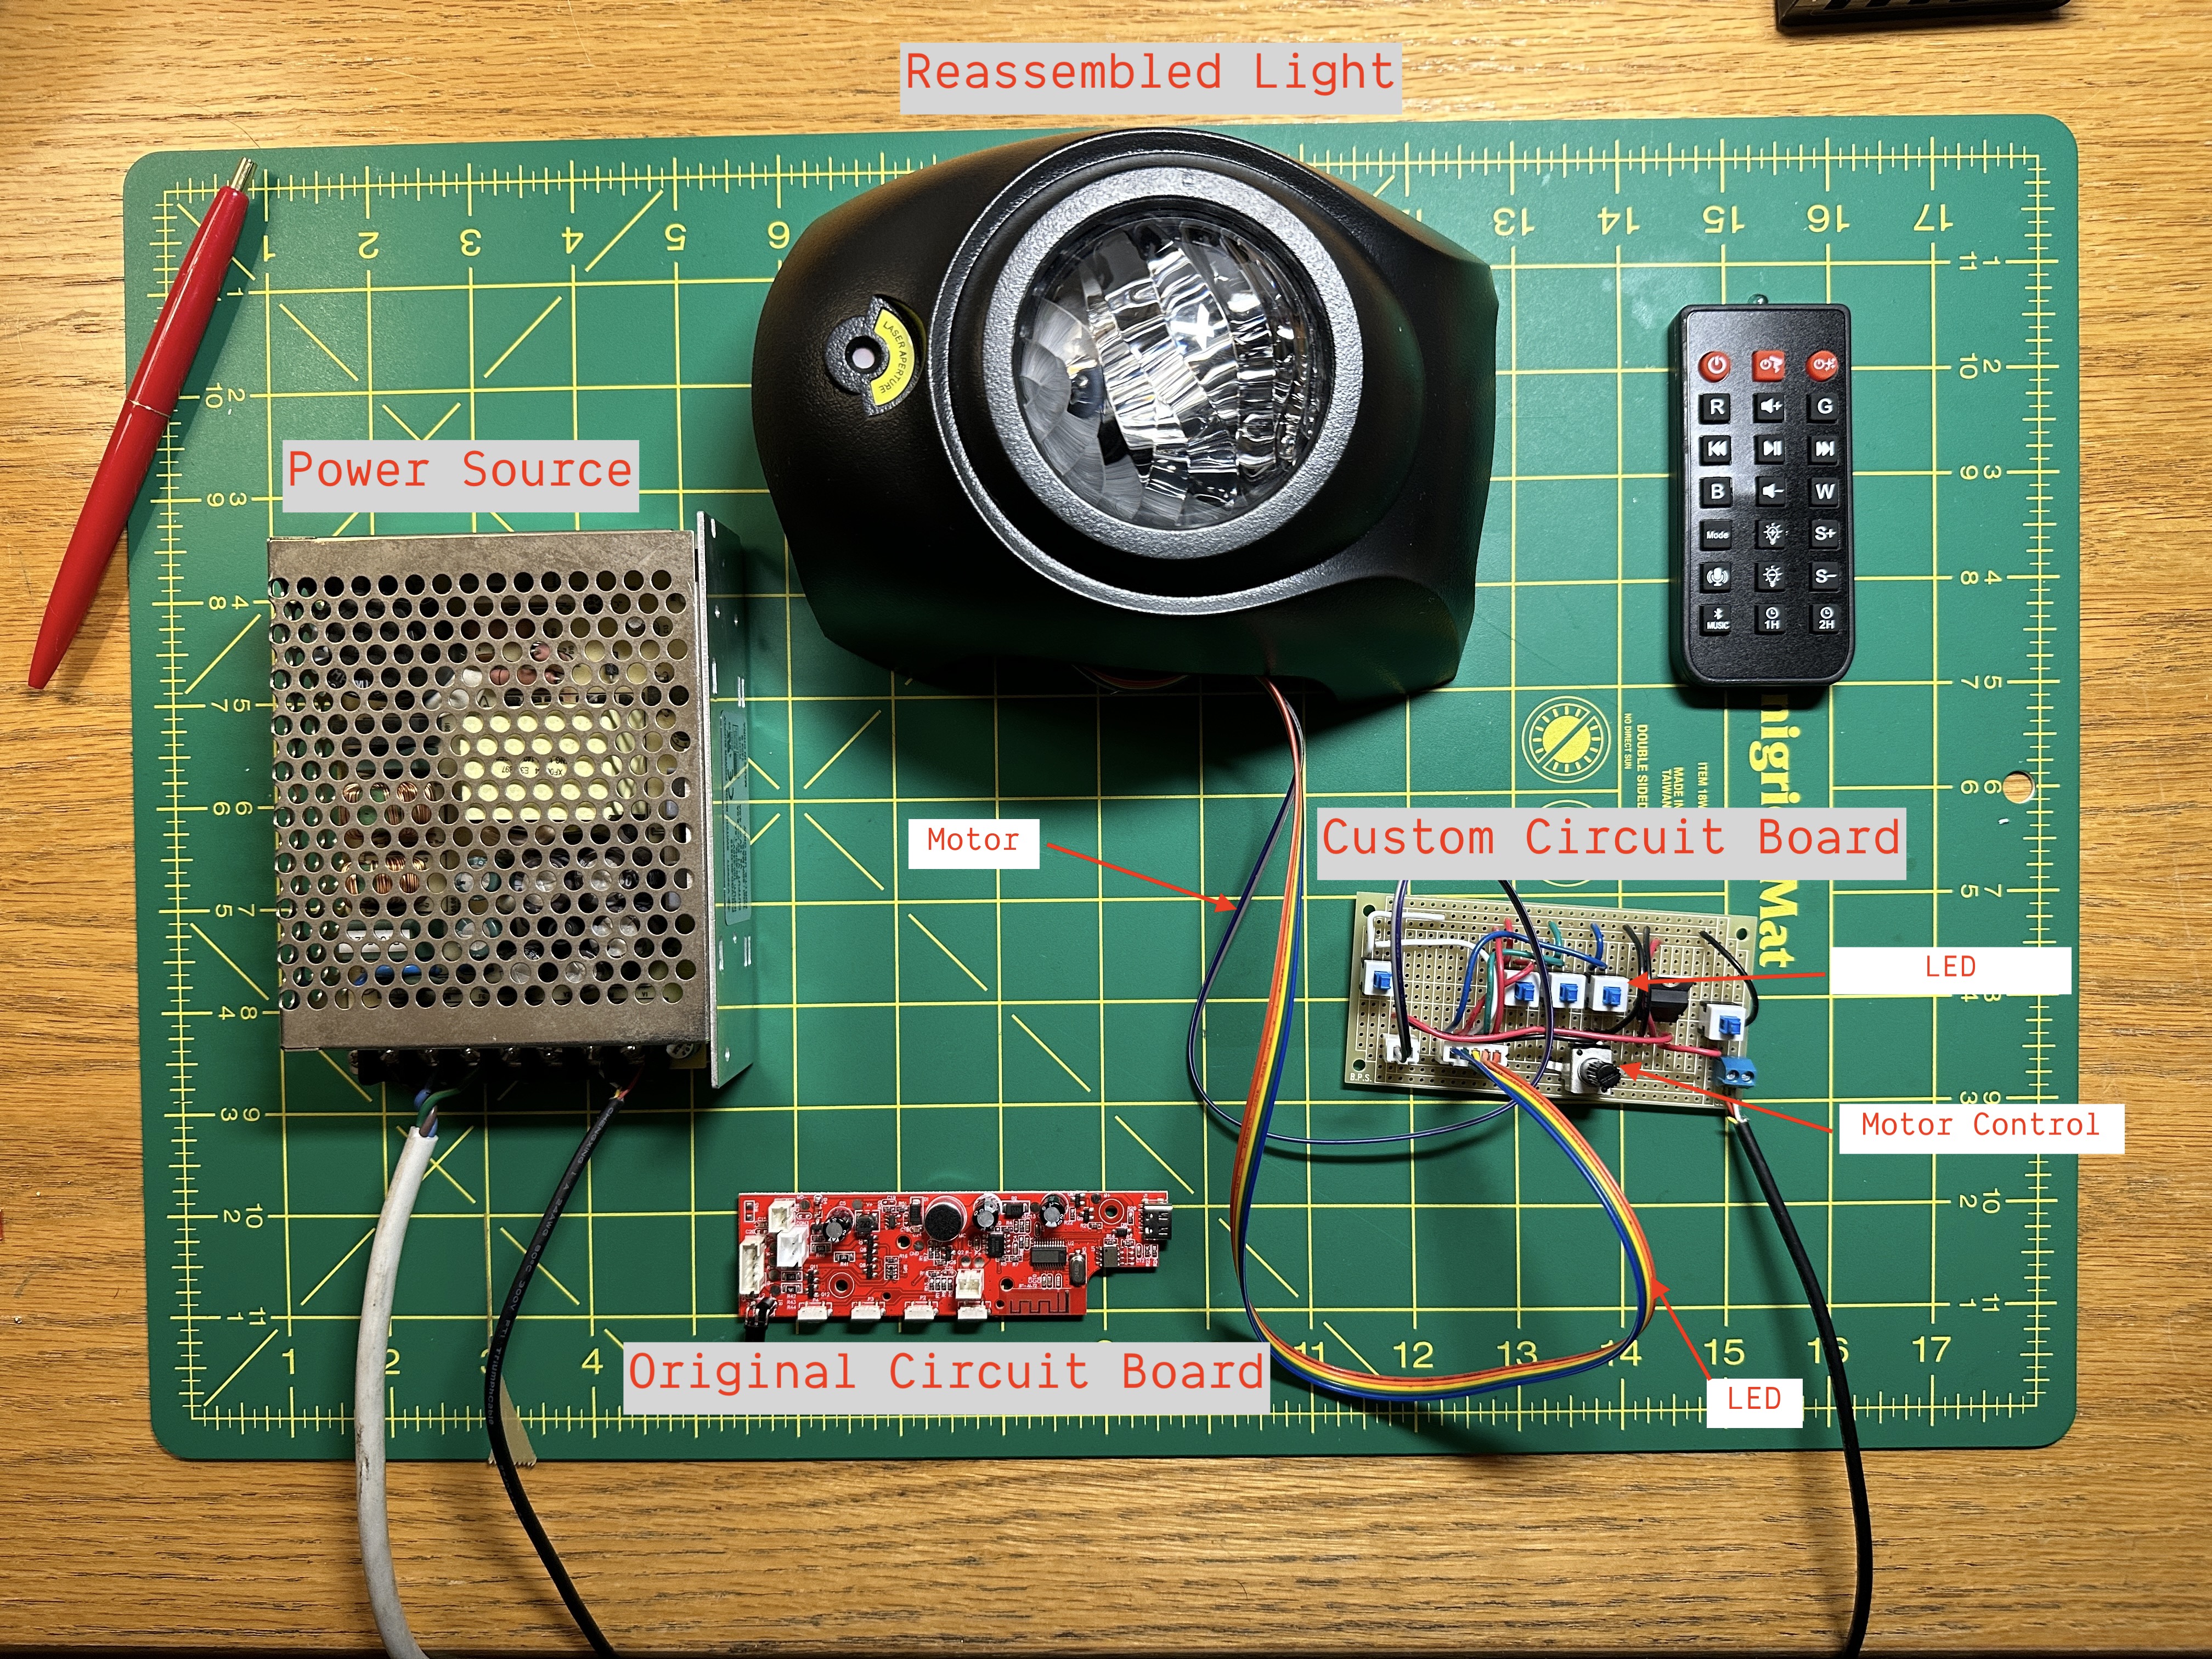
To complete the project, I transferred my breadboard components onto a more durable circuit board, soldering them in place and testing my work at each step.
After all the components were soldered in place, I had a working light with the following features:
- Is powered by a constant 5v power source
- Converts 5v to 3.3v for the LEDs
- Each LED (RGBW) is individually controlled by a switch.
- This allows us to choose/set the correct mix of Red, Green, Blue and White at the time of install by setting the switches.
- 5v to the motor
- The motors speed is adjusted with a potentiometer
- This allows us to choose/set the correct speed of the lighting effect at the time of install by setting the potentiometer.
- Can be turned on/off with a switch for convenience
Finally, I packaged the final product together in a large tupperware (not pictured) so we could keep it safe and dry for the month of installation!
This year, like last, was so much fun bringing our creation to life. My contribution the display in terms of lighting was small and so much credit goes to Julie for her hard work bringing the display to life from her sketches, for building the display, and for pushing us to the finish line this year. Big thanks to the LumiNAMA team for making this year bigger and better than last, and to all the friends who helped pitch in along the way!