Installing Raspian & Configuring for Headless Access
raspberry pi raspian
The Raspberry Pi is a great low cost way to start learning about computers. Getting started with your own project requires some setup which can be intimidating the first time around.
A common source of confusion I see around the web for new users is headless configuration. Running headless means you won’t be using a dedicated monitor and will be controlling your pi over an SSH connection.
This post should help clear things up by covering how to
- copy the operating system to your SD card,
- configure WiFi and
- enable SSH.
This should get you up and running in headless mode, ready to hack away 👨🏽💻.
For another source of info see the Raspberry Pi Foundation’s documentation.
Finding the SD card
First up, we need to find the location of your SD card, that’s where we’re going to install Raspian and do our configuration 💪🏼.
Insert your SD card into your computer, open your terminal, and count to 5 ⏰. Afterwards, type diskutil list. This will list the attached storage devices, your SD card should be in the list.
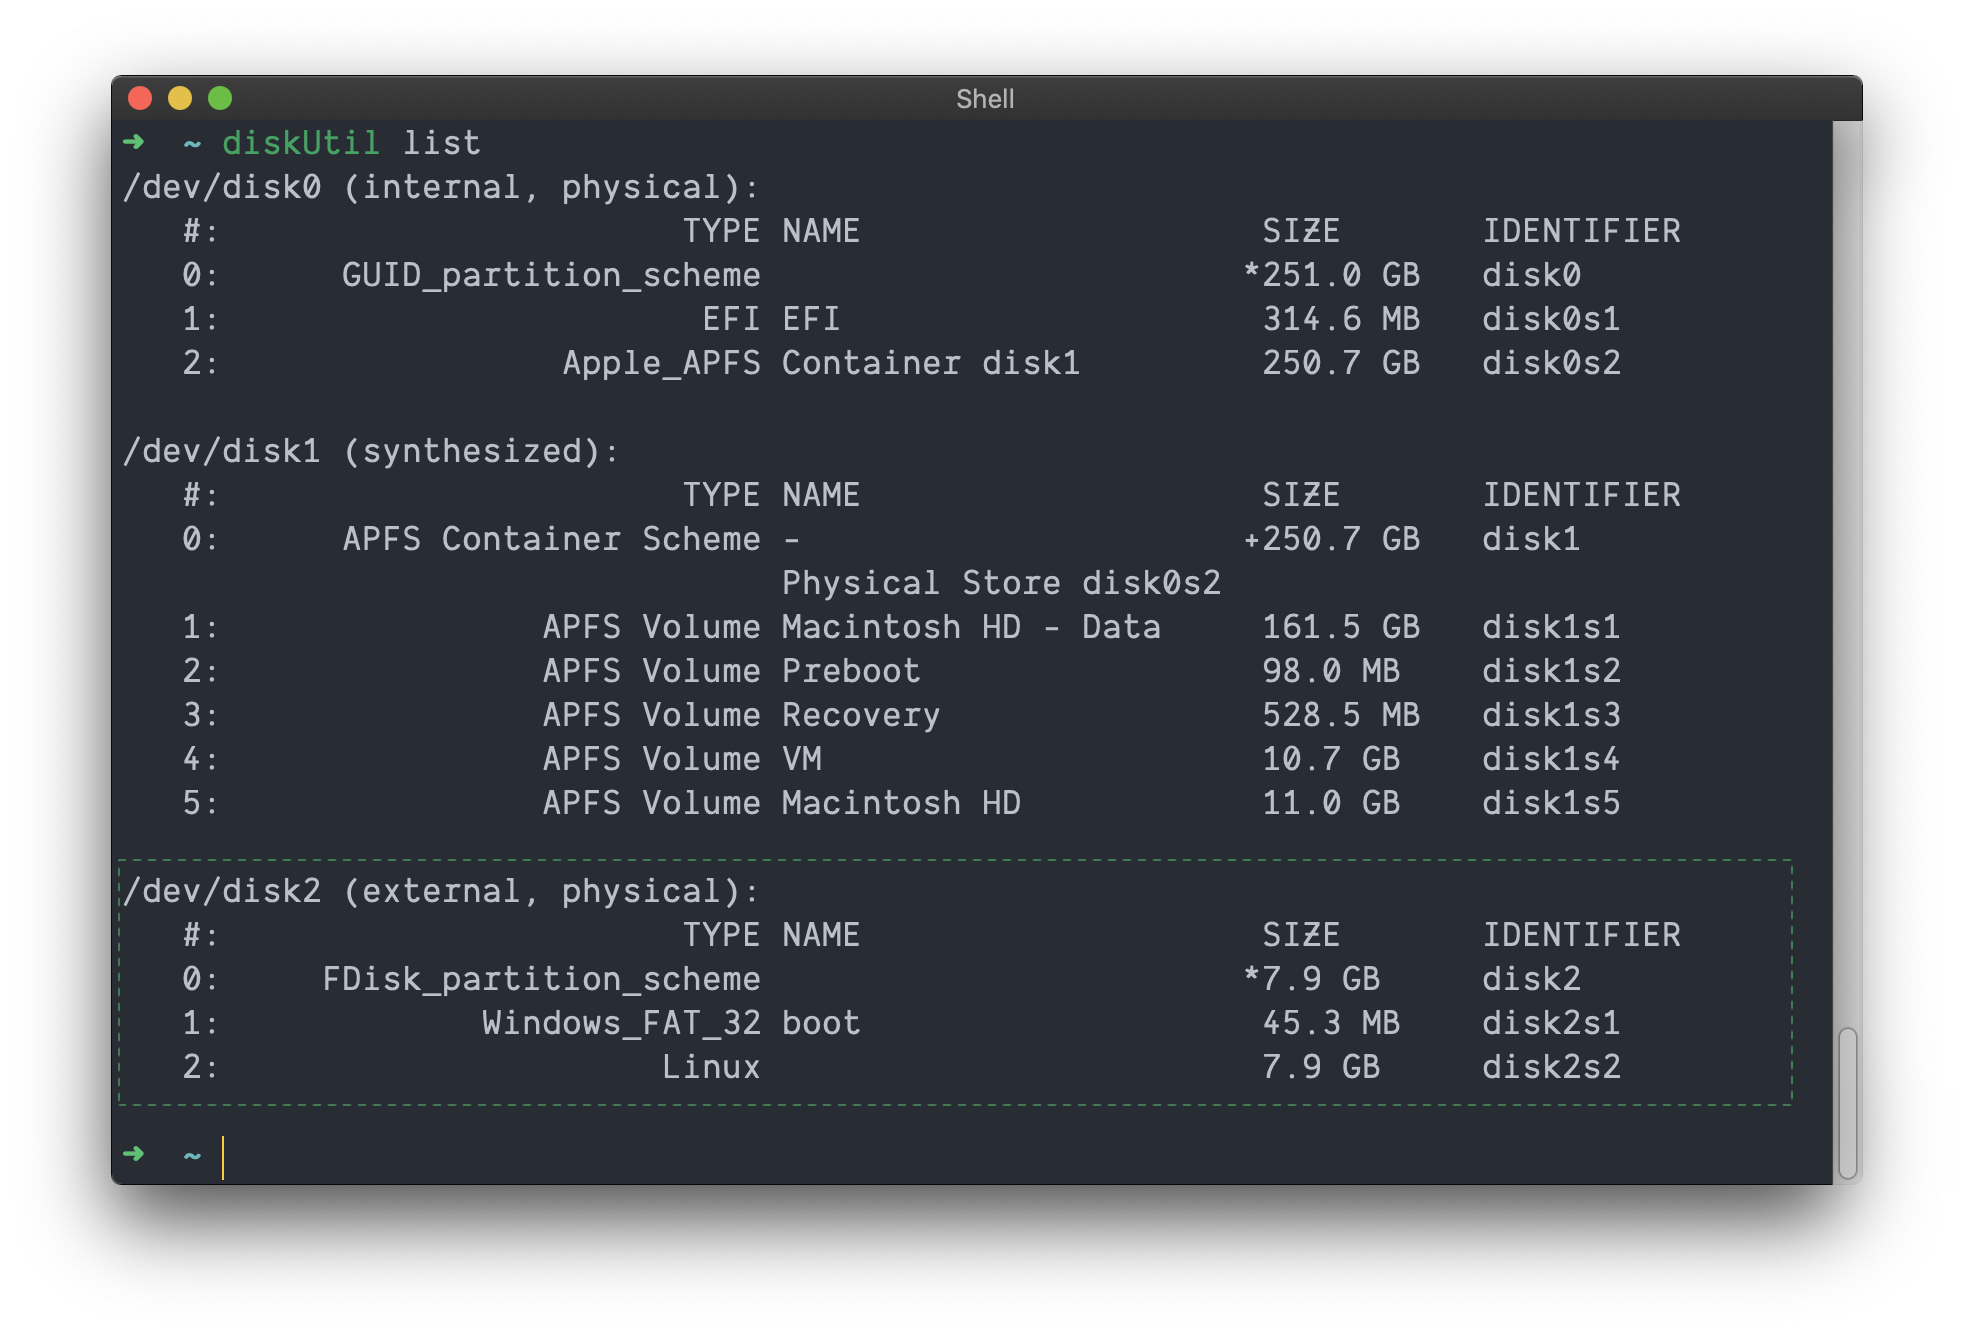
I found my SD card at /dev/disk2. I know it’s the SD because the size matches and it’s labeled as an external disk.
Formatting the SD card
Now that we know the location of our SD card, it’s time to format it.
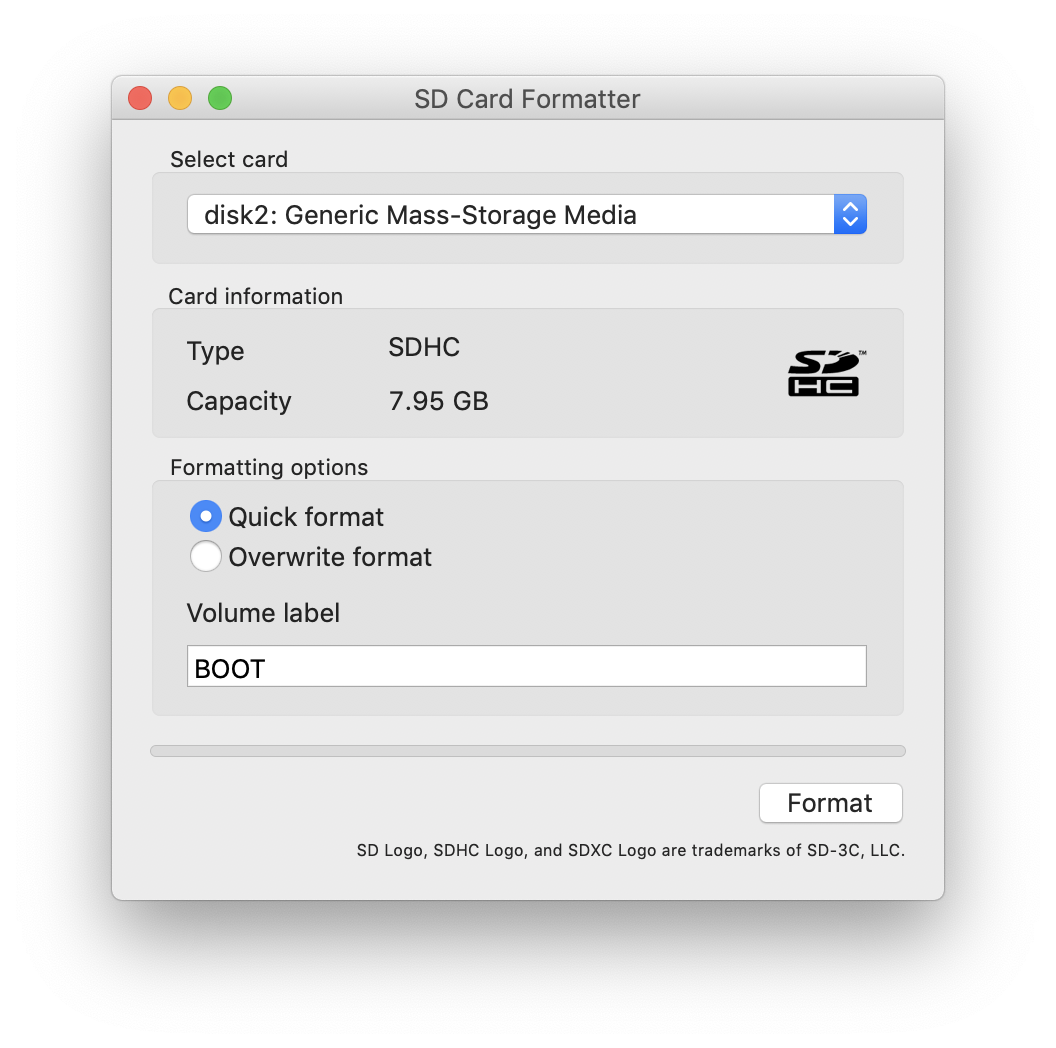
To keep it simple I’m going to use the SD Memory Card Formatter to format the card. Select the location of your card in the dropdown, choose Quick format, and press Format.
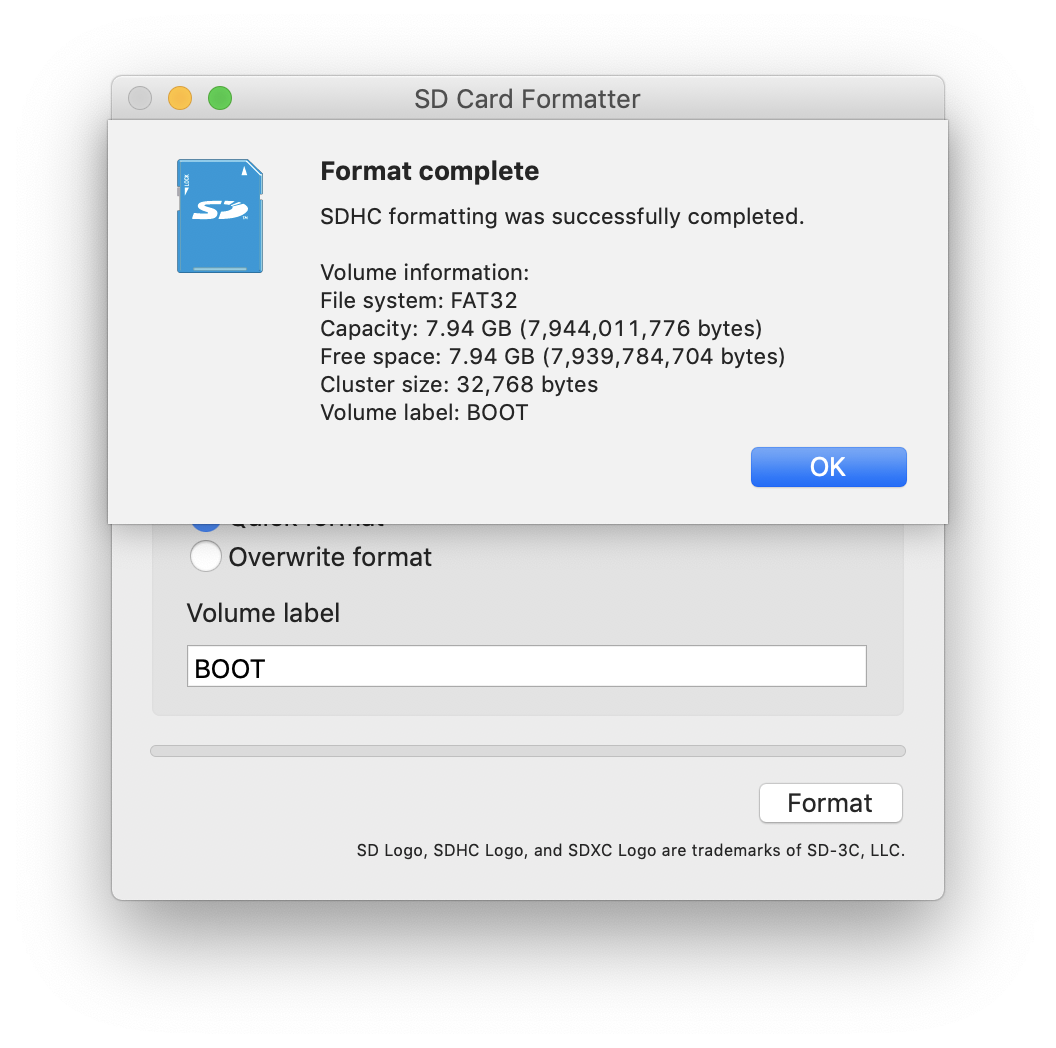
Once formatting completes you should get a confirmation screen like this 🎉
Burning Raspian to the SD card
Okay… Now that we have a formatted SD card it’s time to transfer Raspian onto it. You can choose a distribution from the Raspian downloads page. In this example I’ll use a copy of Buster Lite but any Raspian distribution should do!
Begin by un-mounting the disk you formatted above ☝🏽with the following command.
diskutil unmountDisk /dev/disk2
Once the disk is un-mounted we can copy the OS by running the following command.
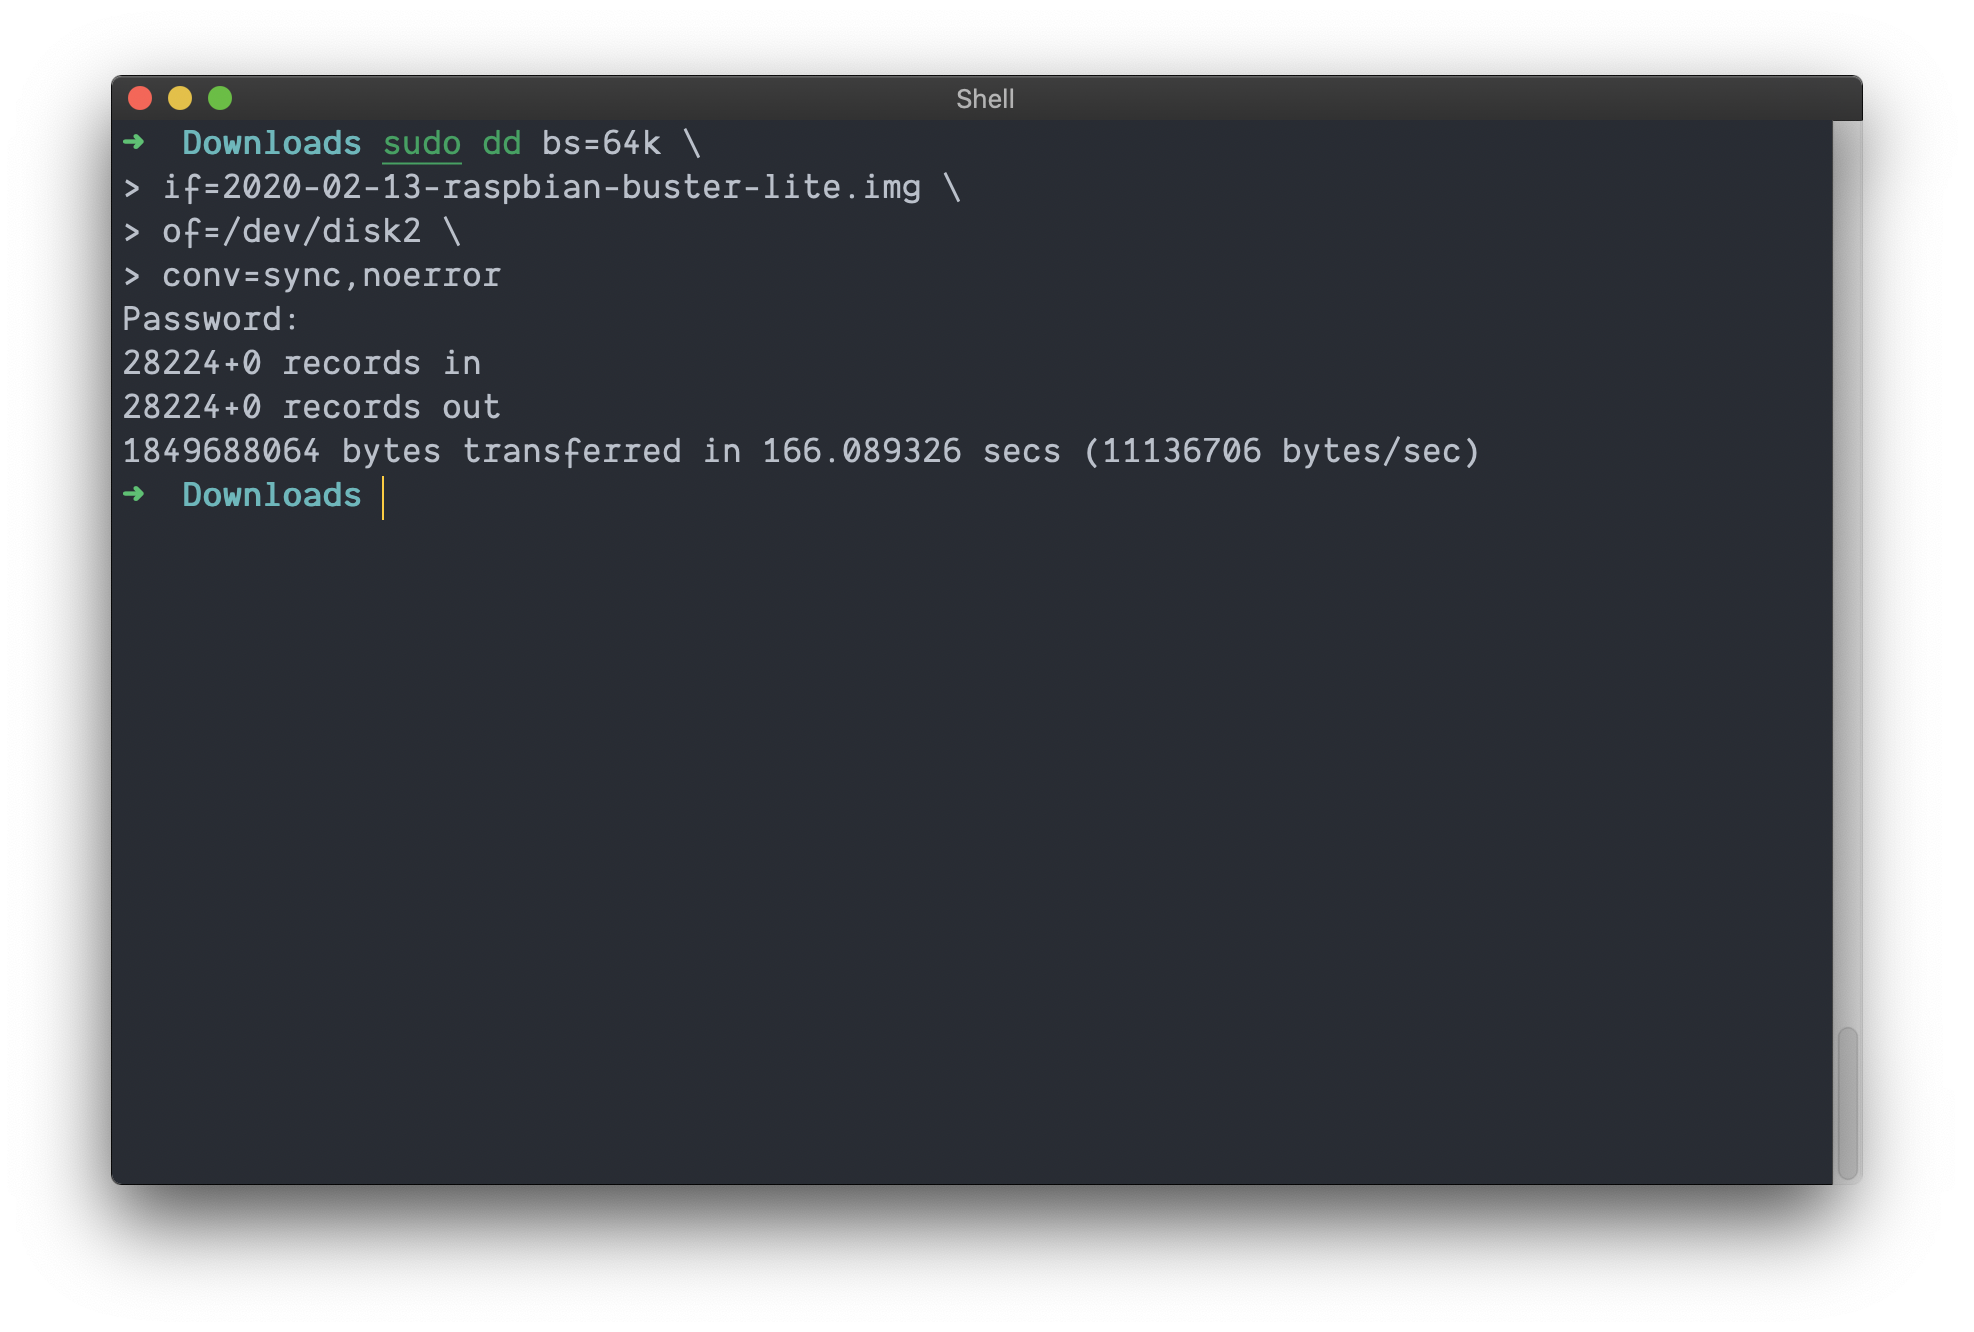
cd or specify the full path to your image to if=sudo dd bs=64k \
if=2020-02-13-raspbian-buster-lite.img \
of=/dev/disk2 \
conv=sync,noerror
Above we’re using the command line utility dd to copy the image to our card.
bs= is the block size, or the number of bytes that are read/written at once
if= is the input file source (the Raspian image)
of= is the output file source (your SD card)
conv= has to do with block padding
This might take some time… It took my machine 166 seconds to complete. Don’t worry if you don’t get immediate feedback 😰! Once the transfer finishes you’ll see something similar to
Configuring WiFi
Okay! It’s time to configure our WiFi connection. Without doing this, the first time you boot your machine it will not have access to your home network 🚨.
To setup WiFi, we need to create a new file in the root directory of the SD card called wpa_supplicant.conf.
First, confirm your SD card is currently mounted by running ls /Volumes. You should see boot (assuming you stuck with the defaults when formatting).
Next, run
touch /Volumes/boot/wpa_supplicant.conf
this will create a file called wpa_supplicant.conf in the root directory of the SD card.
Next, you can run the following command to add our configuration to wpa_supplicant.conf.
cat << EOF >> /Volumes/boot/wpa_supplicant.conf
ctrl_interface=DIR=/var/run/wpa_supplicant GROUP=netdev
update_config=1
country=US

network={
	ssid="YOUR_SSID"
	psk="YOUR_PASSWORD"
	key_mgmt=WPA-PSK
}
EOF
We can confirm that worked by inspecting the contents of the file by running
cat /Volumes/boot/wpa_supplicant.conf
You should see the following, with the exception of YOUR_SSID and YOUR_PASSWORD

Okay! One more step to go and we’re ready to boot our Raspberry Pi 🥧.
Configuring SSH
We’ve made it to the finish line 🏁!
By default, newer versions of Raspian come with SSH disabled. To enable SSH we need to create a file called ssh at the root of our SD Card like we did when setting up wpa_supplicant.conf.
You can do this by running
touch /Volumes/boot/ssh
When the Raspberry Pi boots it will check for the presence of this file, and if found will enable SSH.
Wrapping Up
Your SD card is now configured for headless access. You should be able to unmount the disk using
diskutil unmount /dev/disk2
place it in your Raspberry Pi, and boot it up!
You’ll need to find the IP address of the Raspberry Pi after it boots. You’ll use this address to SSH into the machine. You can find the IP many ways, two simple ones are:
- Access your routers admin interface and look for connected devices
- Use a tool like IP Scanner Home
Once you have the IP you can log in by running
ssh pi@<IP_ADDRESS_OF_RASPBERRY_PI>
pi and the default password will be raspberry. Don’t forget to change your password once you log in! You can do this by running the command passwd and following the prompts.Thanks for following along. In another post I’ll cover how to do this configuration via Ansible so we can streamline the configuration of many Raspberry Pi’s!
 _____________________________________
/ Don't you feel more like you do now \
\ than you did when you came in?      /
 -------------------------------------
        \   ^__^
         \  (oo)\_______
            (__)\       )\/\
                ||----w |
                ||     ||